Step 1: Open BIDS and creatre a new Shared Data Source
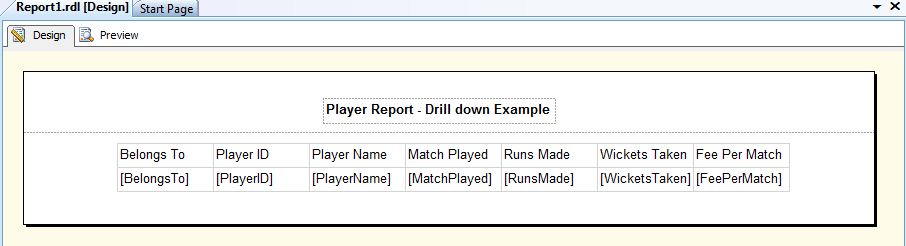
Step 2: Create a Table type report as shown below (The steps for doing so has been described in Part I series).
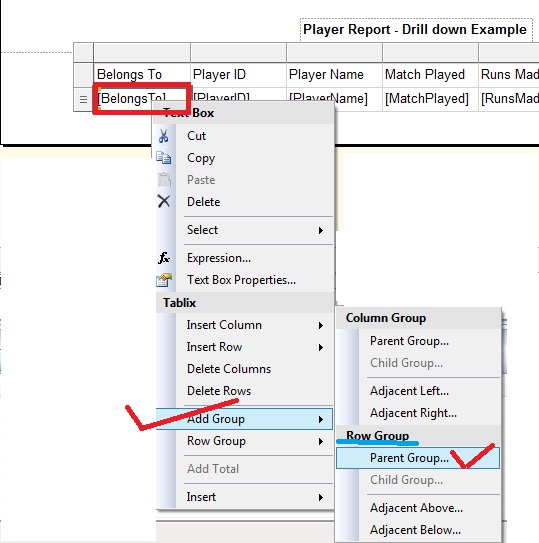
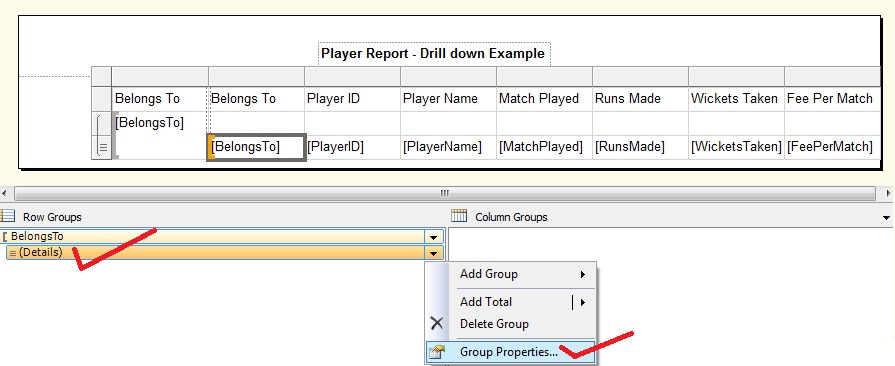
Step3: Next add Parent Group for Belongss To field as depicted under
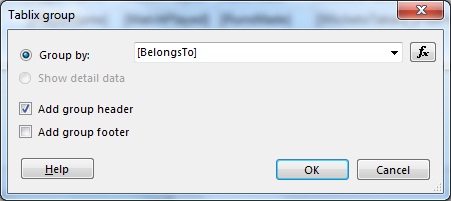
Step 4: From the Tablix Group window, let us choose [BelongsTo] from Group By DropDown and check Add Group Header checkbox, then click OK.
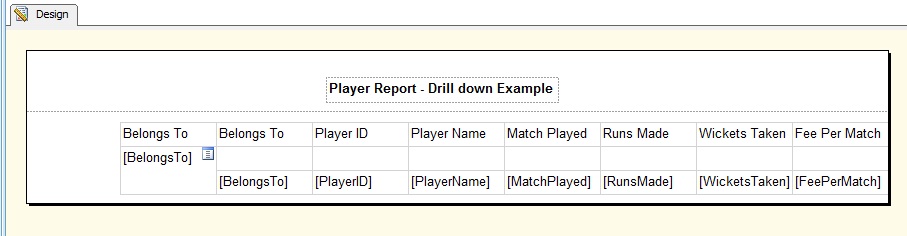
At this point if we the report looks as under in the design view
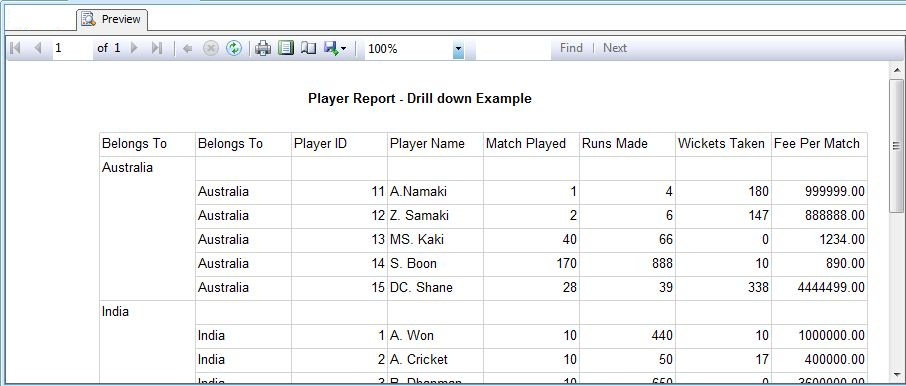
While running the report gives the below impression in the Preview tab
Step 5: From Row groups, choose [Belongs To] Details and then choose Group Properties
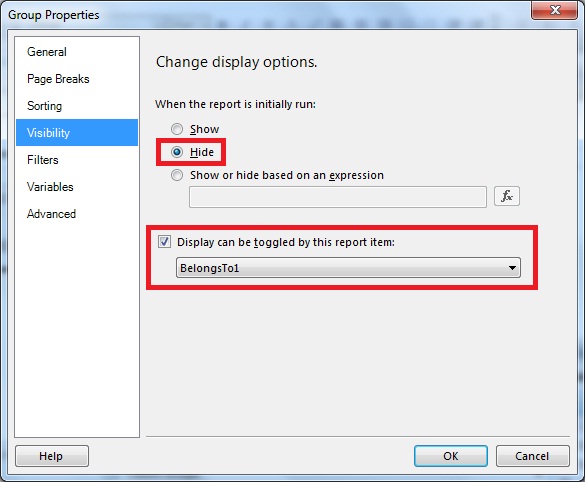
Step 6: From the Group Properties window that opens up, choose Visibility tab. Then select Hide radio button and check the Display can be toggled by this report item checkbox.Then from the drop down that will be enable,select the name of the group (which is BelongsTo1 here) then click on OK
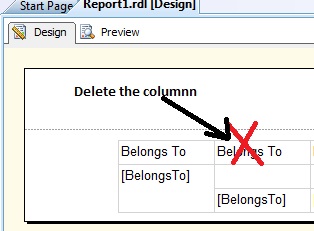
Step 7: Delete the [Belongs To] Details column
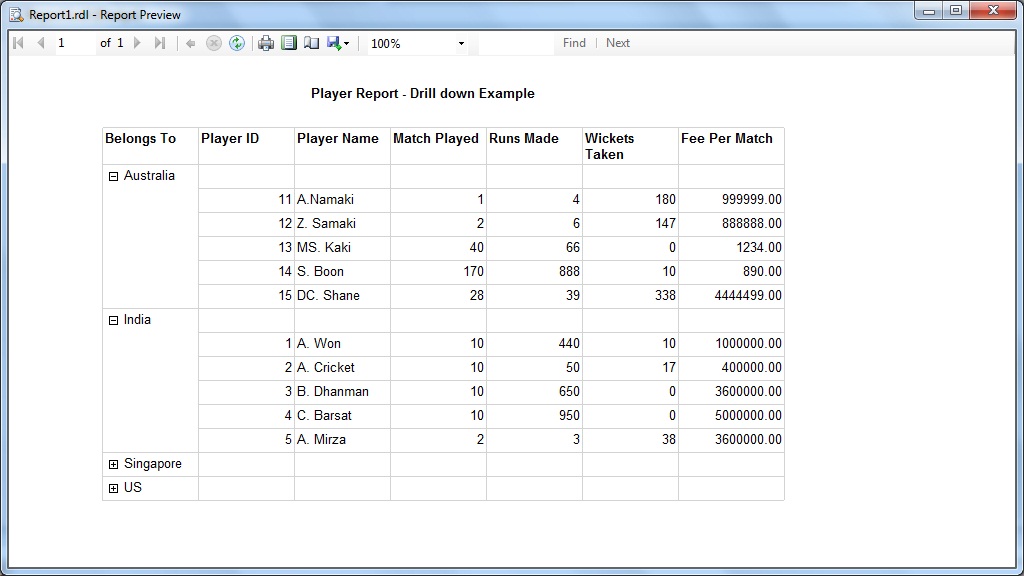
Step 8: Now it's all done. Run the application and the output is as under

No comments:
Post a Comment